Saturday, 29 March 2008

Rock number 59 - Zhang Wang

My head is buzzing after an inspirational day up in town, at the Contemporary Quilt AGM and some serious retail therapy at London Graphic Centre ( sketchbooks , Golden acrylics and media ). Apart from lots of catching up and admiring other peoples progress with Journal Quilts and 'Thin Blue Line' pieces, the afternoon lecture by Alice Kettle was thought-provoking and awe-inspiring. What particularly struck a chord with me was the emphasis on physical engagement with colour , her painterly approach and and looking at sculpture to study the interplay of light on surface. I've certainly gained an appreciation of the latter with my 6 months close proximity with Henry Moore bronzes at Kew. En route to Covent Garden I popped into the British Museum and was bowled over by a contemporary sculpture by Zhang Wang associated with the First Emperor exhibition that summed up all Alice had been saying about light and surfaces.

It is situated in the Great Court, made of very shiny stainless steel, modelled around rock formations (such as are venerated in Chinese landscapes)

It picked up the colour of banners around it but what really fascinated me was how it distorted the very regular geometric patterns of the glazing in the Great Court to something far more organic. Magical! I should say that all these photos have not been manipulated in any way although you could be forgiven for thinking it was all created in Photoshop.


Friday, 28 March 2008

CyberFyber Postcard

I've finished my exchange postcard to return to Susan Lenz. It was the first time I've done a postcard - I thought having worked at A4 scale for many years it wouldn't prove too difficult but although I enjoyed solving some of the technical problems that arose, I can't say I warmed to the technique.


I finished the back off with a digital print ( 'second' quality) and practised using the machine to stitch my signature (normally you can't read my writing so that's a step forward!) However it hid the stitching that I'd done - I like the backs of my quilts to be as interesting as the fronts and they normally are with the amount of stitching that goes into them

I used Timtex to give more rigidity than wadding but it's really wierd to stitch. It's a bit like a shock absorber, swallowing the 'hills and vales' that you get when quilting with wadding. When I was trimming it down , you could see the stitches embedded when viewed in cross section.

This lack of dips and rises became more obvious when I came to paint with acrylics over the stitching (the front base was a slubby kimono fabric) Instead of the stitching pulling up the fabric and wadding, the stitches stood proud on the surface so I didn't get the variation in paint texture I aim for.

Given the limitations I was quite pleased how it turned out but I won't rush to do another.


Tuesday, 25 March 2008

Thin Blue Line Started

A couple of weeks ago I did a 1/4 scale sample piece to test out ideas and fabrics for Contemporary Quilt 'Thin Blue Line' challenge. I made it double sided - both main fabrics used were kimono/yakuta ( conveniently already a narrow width ) and painted with acrylics both sides. The woollen slubby fabric didn't work that well (at least on this scale - its delicacy is more suited to postcards etc) but I was pleased with the results on dark blue/black patterned cotton yakuta fabric which has a slightly starched finish So the Easter weekend was spent scaling up! The original inspiration was of boats moored at Gythion in Greece with the 'thin blue line' of hills in the background. I snipped sections out of the photograph to compress it down to a composition and proportions I was happy with and matched some of the colour in fabrics to insert as thin strips. Having to work to a fixed size of 30 x 120cm meant I had to use some maths and measuring to PLAN where I was going to insert them - not my usual style at all (normally I judge by eye and let things evolve)


I used the technique shown by Alison Schwabe - the strips are 3/4 inch wide and using a scant 1/4 inch seam allowance and careful adjusting and matching under the machine, can achieve gentle curves without using bias strips.

I've just started quilting( using the same fabric on the back although without the inserted strips means that if it all goes horribly wrong when painting, I get a second shot!) I'm using Vandana variagated thread and a double or triple needle. I managed to break 2 new double needles by not re-adjusting settings before inserting the needles - blame the Cava consumed!


Next steps are quilting from the back with perle in the bobbin to emphasise the boat masts and some serious hand stitching


Tuesday, 18 March 2008

Crane Construction

My February Contemporary Quilt 12 x 12 Journal Quilt is based on the cranes on the GWQ site that I see every day on the journey into work. They produce fascinating angles and silhouettes and I like the variety in size and colour (there's at least 8 of them). I played around in Photoshop to simplify the shapes and patterns.


Rather than using applique for the cranes I wanted to piece them so that they were part and parcel of the final piece. Despite fairly careful thought and planning there was some 'unsewing' along the way. First of all I added sky strips to the crane uprights and then cut into the background fabric. So far so good but I came a bit unstuck doing the same with the diagonals - far more difficult to match up ( thank goodness for a sharp new seam ripper!) I thought the insertion of the last red upright would be straight forward but as the strip was wider then the seam allowances had to chop off some of the width so the diagonals didn't look too odd. Perhaps applique would have been simpler but I did achieve a slight 3d quality to the cranes by pressing the seams inwards.


Next the quilting. After establishing some basic lines, I worked mainly from the back using silk buttonhole and cotton perle thread in the bobbin, interpreting some of the patterns in the gridwork in the cranes (they're really complex and change according to what angle you're looking at them ). The sky was quilted following the patterns and swirls in the background fabric but in retrospect something simpler would have been more effective

And then I painted over it in acrylics! I really like what I achieved on the cranes themselves - just what I was hoping for, with the quilting and background colour showing through the paint. The sky was less successful - mainly as the quilting was too fussy

Overall I was pleased with the results , especially the composition and the patterning on the cranes - definately scope for further development of ideas. I also had a go at attaching a facing using the techniques explained on 'Jeri-Rigged' blog. This worked reasonably well for a first attempt but another time I'd use thinner strips for this sized piece.


Sunday, 16 March 2008

March Take it Further - A Bit of Fluff

Had a very productive, creative weekend. On Saturday there were 2 inspiring and thought-provoking talks at the Quilters Guild Region 1 area day followed by a visit to the V&A museum to drool over the wonderful ikats. They reminded me that I have a couple of ikats bought from John Gillow that I should get round to re-hanging - they'll go very well in the 'Parlour'. Today I've been finishing off the stitching on several test pieces and painting them (more on that in another post) and putting the finishing touches to my March 'Take it Further' piece based on a Photoshop altered image of my husband's chest hair. I decided as the theme was concentrating on the small details, that I would zoom in on particular areas , as if with a magnifying glass.

Finished piece ' A bit of Fluff'. The image was printed on cotton poplin treated with 'bubblejetset 2000' as were the close-ups, placed on 'select' weight polyester wadding and free-motion quilted with variegated threads . I cut out out circles from the magnified images and wrapped them round wadding ( polyester 'request' weight from wadding sample pack) and sewed them onto the quilted background using needle-turn applique. Metallic cord was couched down on these areas with zigzag stitch.


Detail of couched threads. The edge of the piece was finished with the same metallic cord.
Overall I was pleased with what I achieved. I learnt from my February challenge and instead of trying to make it up to A4 size, just trimmed it down. The only thing I might have done differently is to leave some areas unquilted to give more variety in texture.

Tuesday, 11 March 2008

CyberFyber Exchange

Over a week since I last blogged - standards are slipping! Last week I received this postcard from Susan Lenz as part of her Cyber Fyber project - I now need to make postcard to send for her exhibition . Great idea! Its made using an embellisher - not something I've wanted to have a go at myself but lovely to receive. I'm planning something painted in return.Besides making some headway on my March TIF challenge and on a piece based on cranes in Brentford, I've been teaching an orchid seed sowing course and taking delivery of some brand new bookshelves for the 'parlour' . I've been having a happy time unpacking some of the book boxes that have been in storage and trying to be ruthless about rationalising it ( as I did with my fabric stash a few weeks ago). I had an editing session before they went into storage but I've moved on so much just in the couple of years since then. Where's the best place to get rid of dated quilting books ?(some might count as antique!)

Monday, 3 March 2008

Take it Further March

The concept for this months TIF challenge is 'the little things , the small moments , the details in life' which appeals to me rather more than the colour palette (particularly as the colours on the screen were difficult to reproduce in printing )
I thought initially of all the small plants I work with and views down the microscope which has been a source of inspiration for many pieces. The 'bryophyte' quilt below was made as a leaving present for a member of staff who worked on mosses, based on photographs manipulated in Photoshop
One of the photos used was of an aseptic culture of the threatened moss Orthodontium gracile

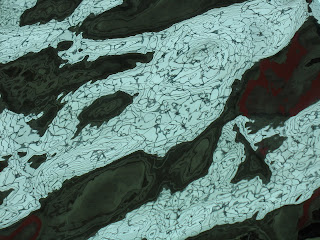
Now you might think that the images below, manipulated in Photoshop, are also botanical in basis. Wrong! I was looking through some photo files for something else when I came across some pictures I took of my husbands chest hair! I have his permission to share them with you but I won't embarrass him by showing the original photos - these have had multiple filters (including swirl, cutout, find edges) and colour balance/hue/ saturation adjustments applied.


At one time, my work was my life ( with a bit of quilting on the side) and I suffered as a result. I was just thinking that in choosing an observation of my husband as inspiration, in preference to a plant, that this reflects a healthier work/life balance. And just as beautiful.