Showing posts with label etching. Show all posts

Thursday, 3 September 2015

Sketching Barkcloth at the British Museum

 This weeks ' drawing Tuesday'  expedition was to the  Pacific Barkcloth exhibition at the British  Museum ( which as the main  print /drawing gallery was closed, involved going up  through the Japanese gallery and then down again).  As I've already visited twice  before ( see here)  I already had an idea what I wanted to draw but  looked at it in a new perspective.
I settled on trying to capture the patterns of this loincloth  - through a very quick fine pen sketch  for a rough overall layout and then some details in thicker felt-tip.  The more I looked and drew, the more I felt a connection with the maker - the unevenness of the ink and line,  the variations in the surface,  and the riffs on  what seemed initially like the same  pattern.

 Concentrating  on the  patterns painted on the cloth , my attention kept being drawn to the fringe at the bottom and it's shadow, liking the  positive and negative shapes  so I   then attempted drawing this in 2H and 2B pencil. Lots of counting and rubbing out - it's still not quite right.  The light was so poor I didn't realise until I looked at the photos on the research pages that  its constructed  with 1  strip 'stitched' through the edge to leave 2 strands dangling - makes more sense than cutting into the edge.   

  I then turned my attentions  to this headdress  of barkcloth with bound feathers, drawing it from some distance   from a convenient bench then looking closer at the details of the bindings.  The feathers I particularly enjoyed drawing - pressing hard with a 2H pencil from the base and using my whole arm in a 'whoosh' of lighter pressure to the tip. Very satisfying to engage with materials - for years I've shunned pencil  wanting to dive straight into colour  but the City Lit drawing course   challenged my prejudices.   
 
 I  was trying  to remember what the feathers ( and the action of drawing them ) reminded me of , then looking through my photos from my first visit  to the exhibition in April I remembered- the etchings of paintbrushes  by Jim Dine which were in the next  gallery. I was then about  to start my printing course and look on them now with even more awe knowing what's involved. 
 

Friday, 26 June 2015

Printmaking Week 8 - Aquatint , Develop Your Drawing Week 7

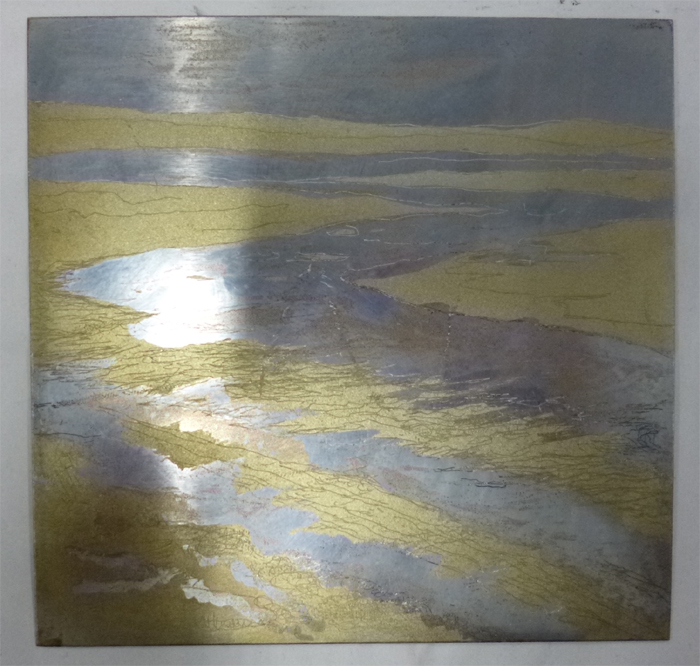
 I was really pleased  with  the effect of aquatint , it  looks a bit like my original watercolours of Fleet mudflats.  I still need to work out  how to disguise the accidental  marks - maybe some drypoint?
  On a scanned copy of my etching  I used some    grey Pitt pens to   colour in areas with 2 different  tones. Then using etching stop-out varnish ( as sticky bituminous  mixture)  on my plate I painted the areas that would  be reserved as white, a counter-intuitive  procedure!
Then donning mask and gloves,  a thin layer of resin was  applied to the plate using aquatint box ( basically a dust cloud of resin! ) I should really have used the stop- out afterwards as it's inflammable and part of the process involves heating the plate from underneath to melt the resin.  


 Then the plate was put in week acid for 15 seconds, more stop-out varnish applied to  light toned areas just etched   and for the darker tone the plate was put in the weak acid for a further 45 seconds.
Then  the stop-out varnish was removed with paraffin ( resulting in this rather nice  effect of the gold of the resin) ) and the  resin removed with methylated spirits. 
 
Then the exciting bit! There was just time to ink up with Prussian blue - I'm getting better at judging how much ink to take off , and put it through the press.  

 
 I'm not sure  I'll want to do etching and aquatint  in  the future,  as it requires access to facilities and there's a lot of processes involved.  But I've gained a whole new respect and insight  into  what goes into an etching and  looked at the prints in the RA summer Exhibition  with a new perspective  on my visit on Wednesday (more in another post)
 
 
The 'Develop your drawing ' class this week  was off-site  around Waterloo Bridge collecting sketches  and information   for a 2 week project  on the theme of Journey.   My sketches really were sketchy but I had a lovely time scribbling .Below are some of the photos I took as a reminder, I'll probably do a bit of playing in Photoshop to develop some ideas for next week.


Wednesday, 17 June 2015

Printmaking 7 : Etching and Drypoint Proofs

 First thing I did in my printmaking class was to put some paper into soak for taking proofs of my etching  but I had ( almost) instant gratification as there some paper already prepared in the blotter. Applying ink and the wiping it off again always seems counter-intuitive  but I loved the marks and the 'foul-biting'  where the hard ground wax wasn't thick enough. Shame about the unintentional mark across the middle  which occurred I think when I was applying the parcel tape to  the back of the plate and didn't give due care to protecting the front. Anne- Marie scanned  my proof and printed off some copies so I can play with  working out which areas  to use  2 different tones for aquatint. 


Meanwhile I did some more work on my drypoint plate of sand ripples.  Although also an intaglio technique, as it's printing from the rough burr produced from scoring into metal rather than a groove from acid etching, the  printed lines on the proof were either too harsh or too subtle compared to the plate itself ( below). Again, I have some scanned copies to  plan what to do next. 


Friday, 12 June 2015

Develop your Drawing 5; Printmaking 6

This week on drawing course at city Lit  we were exploring properties of pencil: the different marks of  2H, HB, 4B  during the warm-up observing the outlines and shapes of a tangled heap of tools borrowed from the sculpture room.

Then we chose 1 item to do a large  close-up on a A1 sheet after filling the whole sheet with a mid tone. Despite using several  2B pencils in each hand  it still took a lot of time and effort - I was so ready for my coffee and Portuguese custard tart ! The coffee holder was just what I needed to prop up the wrench - the photo is deliberately blurred  by the way.
Later in the print class, I traced a section of  the mudflat photo I've also been using as inspiration for my collagraphs , then turning it over and using carbon paper, transferred the  main lines  onto the hard ground  plate I prepared last week.
Then I worked into  it a bit  inscribing the wax with a biro,  trying not to do too much as will be using the same plate for aquatint and possibly soft ground
Then 4 minutes in acid! Picked up some additional unwanted marks somewhere along the way ( the wax layer was very thin), I'll just have to incorporate them somehow into the design. No time to make a proof , that will be the first task next week.
Very difficult to take photos of such shiny images but I wanted to record the stages for my sketchbook.

Wednesday, 3 June 2015

Develop Your Drawing 4 : Changing View Points

This week in drawing class at City Lit we got to play with colour!! 

 Warm up was with graphite sticks following ' skylines' of  shapes of still life  without looking at paper - first with sharp end then blunt, broader marks.
 Then 1st exercise with red, blue and orange pastels : elipses in red, vertical lines  in blue, horizontal  lines in orange. Then for 2nd exercise the still life was moved 90 degrees and  exercise repeated  with blue elipses, orange vertical lines, red horizontal lines.

 For 3rd exercise the  still life was moved a further 90 degrees and  zooming in on detail  with v large orange elipses
 Next the challenge was to work into what you had , joining up areas  with addition of black and white, developing a composition. Started with applying charcoal to to all the white areas to provide a toned background  and rubbing everything back with a rag ( absolutely filthy at the end of the session! )
 Break for coffee and Portuguese tart then more work  adding darker areas, trying to pull the picture together.
Final  version improved by cropping  but ran out of time to increase range of tones with more darks and lights. Composition isn't great- it's  hard  working on such a  large scale  and could have done with more variety of marks. But I had fun!!
 
 
Nothing to show here for the printmaking this week. Apart from taking in some black paper to take some embossed prints of my collagraph plates I was mainly preparing a plate for hard ground etching. Polishing the plate with brasso  reminded  me still need to do the knocker on our newly painted front door! Then it was bevelling edges  with file;  degreasing with ammonia/ whiting mix and applying and removing hard ground wax with a roller ( a knack that obviously needs  considerable practice) Anne-Marie was very patient with me. 
 

Sunday, 10 March 2013

Morandi -Lines of Poetry


When I went to the WEFT exhibition at SOAS a couple of weeks ago, I picked up a leaflet about an exhibition of Morandi etchings ( very stitch-like) at the Estorick Collection in Canonbury Square. Researching it further, found it had received some excellent reviews here, here , and here.
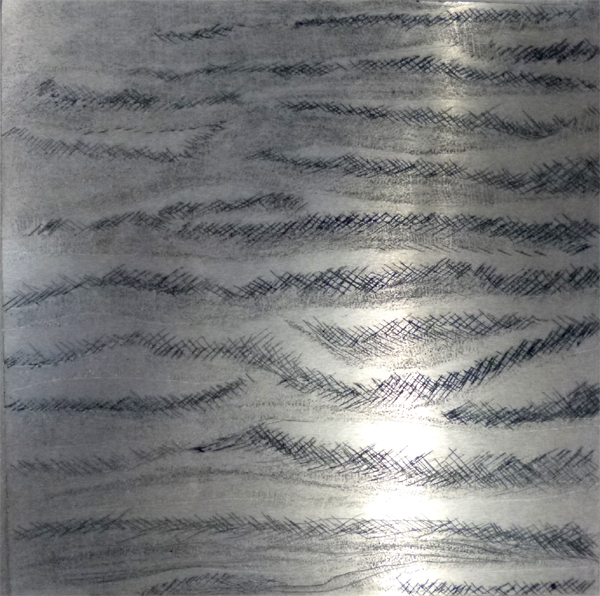
I visited on Friday  - it's an absolute gem of a place with a wonderful Italian Cafe.  I get into most exhibitions for free with my staff pass (as a member of Consortium of Museums and Galleries). On this occasion I had to pay so perhaps  appreciated it more - I spent a couple of hours looking very closely at the marks and cross hatching, making notes in my sketchbook, slightly marred by an elderly Morandi fan telling me I was not drawing properly!! Bought the exhibition catalogue  and have ordered a couple more books too.
Perhaps she would be reassured to know I signed up for  an art class on 19th April for a Morandi-inspired still life, looking at the techniques he used.
There was a subtitled  documentary  on Morandi on show which gave a fascinating glimpse into his life and surroundings - and an excuse not to dust ( most of the bottles he used had years accumulations!)

On Saturday ventured by bus to Landmark Arts Centre for the annual Contemporary Textile Fair. Always good to catch up with various  people. This year I was particularly taken with the atmospheric work of artist Debbie Lyddon.